Polygon Texturing 3: Normal mapping
Mohamad's interest is in Programming (Mobile, Web, Database and Machine Learning). He is studying at the Center For Artificial Intelligence Technology (CAIT), Universiti Kebangsaan Malaysia (UKM).
[1] Introduction
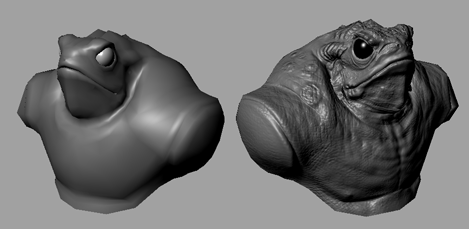
Normal mapping is a technique in which you use a high resolution mesh to generate a map for a low resolution mesh. High resolution meshes are made of more complicated geometry and can be very taxing in an environment where resources are at a premium (for example, in a large scene with other high poly objects, or on a system with limited processing power). As a result, performance can suffer greatly. Normal mapping is commonly used in these situations to capture the detail of a high resolution mesh with the geometry of a low resolution model.
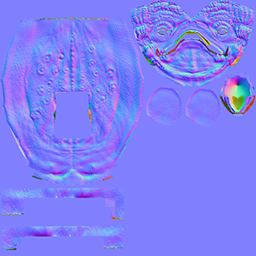
A normal map differs from a texture map in that it produces a multi-channel image (shown below) based on the normals of the high resolution (source) mesh. This information is used to light the mapped details on a low resolution (target) mesh convincingly, even though the surface itself is relatively flat.
In this lesson you learn how to:
Create and apply a normal map.
Display the poly count for a scene.
Set the Search Envelope for a target mesh.
Set Default Rendering mode and High Quality Rendering mode.
[2] Lesson setup
To ensure the lesson works as described, do these steps before beginning:
Make sure you’ve done the steps in Preparing for the lesson.
Select the Rendering menu set.
Select Renderer > Default Quality Rendering from the panel menu.
[3] Open the scene for the lesson
To create a normal map you need two files, the source and the target. The source model is generally a higher resolution and more detailed version of the target model. The target has the geometry you actually want for your scene.
To open the high resolution model
Select File > Open Scene.
Navigate to GettingStarted2015LessonData\UVMapping, select Toad_hi_res.mb and click Open.
A high resolution polygonal toad model appears in the scene.
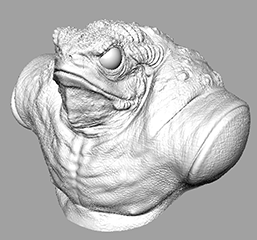
Tumble the view around the toad model.
Maya may respond slowly because the mesh is highly detailed. You can see exactly how detailed it is by turning on the Poly Count display.
To turn on the Poly Count display
- Select Display > Heads Up Display > Poly Count.
Statistics about the scene appear in the top left corner of the main viewport. This model consists of over a hundred thousand faces just for the head and upper torso. Loading such a high resolution model into the scene is impractical for performance purposes.
Now compare the high resolution mesh with the low resolution alternative.
To import the low resolution model
Select File > Import.
Navigate to GettingStarted2015LessonData\UVMapping, select Toad_lo_res.mb, and click Import.
A low resolution polygon model loads on top of the high resolution toad model.
Select the high resolution model and hide it by pressing
Ctrl+ h.
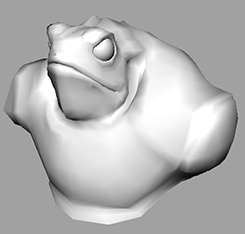
The low resolution model is much more manageable in size with just over 1500 faces. However, while it maintains the basic shape of the high resolution toad, it lacks much of the detail.
[4] Creating a normal map
A normal map is a type of transfer map, meaning that it is a texture created from a polygon object. Different transfer maps handle the conversion from polygons to textures in different ways. A normal map captures the surface normal information of the source mesh and uses it to light the target mesh.
To set a base material for the target mesh
Right-click the mesh and select Assign New Material from the pop-up menu.
The Assign New Material window appears.
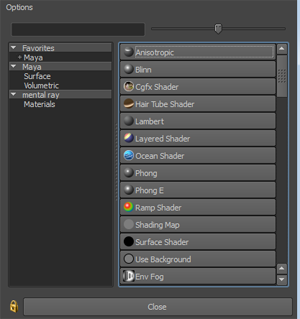
In the list of materials, select Blinn.
Maya applies a default blinn shader to the low resolution mesh.
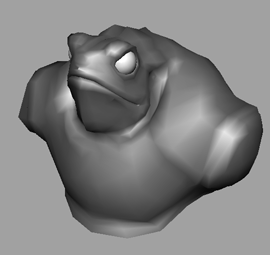
Close the Attribute Editor.
To show the high resolution mesh
Open the Outliner (Window > Outliner).
In the Outliner, select hi_res_toad.
In the main menu bar, select Display > Show > Show Selection.
Both meshes appear in the scene overlapping each other.
Deselect the high resolution mesh.
To create a normal map
Select Lighting/Shading > Transfer Maps.
The Transfer Maps window appears.
The Transfer Maps window lets you create various textures based on mappings from polygon models. First you need to assign the source and target meshes for the transfer.
In the Outliner, select Toad_lo_res:lo_res_toad.
In the Transfer Maps window, in the Target Meshes section, click Add Selected.
In the Outliner, select hi_res_toad.
In the Transfer Maps window, in the Source Meshes section, click Add Selected.
Next you need to set the Search Envelope.
The Search Envelope represents the volume of the target geometry to consider for the texture. Whatever part of the source mesh between the Search Envelope and the target mesh is mapped to a texture.
Generally you want the Search Envelope to encompass your entire source mesh so you don’t miss any detail.
To set the Search Envelope
In the Transfer Maps window, in the Target Meshes section, set the drop-down underDisplay to Envelope.
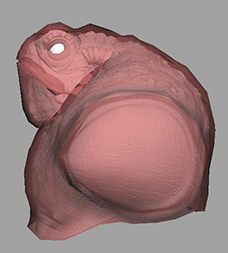
The low resolution toad is replaced by a translucent red mesh.
This red mesh represents the Search Envelope.
Drag the slider under Search envelope (%) to the right.
The red mesh grows.
Drag the slider so that the red mesh barely encompasses all of the high resolution mesh without leaving any white spots (excluding the eyes). You can also enter a value in the box next to the slider. In this case, a value of 4.3 yields just enough coverage around the two meshes.
Set Display back to Mesh.
Now you can set the normal map options.
To set the normal map options
In the Transfer Maps window, under Output Maps, click Normal.

In the Normal Map text field, click the browse icon (

).
A file browser appears.
Navigate to GettingStarted2015LessonData\UVMapping and enter the name toad_texture.
Set File Format to DDS (dds).
Click Save.
In the Transfer Maps window, under Connect Output Maps, set Connect maps to to Assigned shader.
Under Maya Common Output, set Map width and Map height to 1024 and Sampling quality to Medium (4x4).
Click Bake and Close.
Maya generates a normal map.
NOTE:
It may take a few minutes for Maya to generate the normal map.
[5] Viewing a normal map
Now that Maya has generated the normal map, you need to change the render mode to High Quality Rendering mode to see it.
To view the normal mapped texture
Select the high resolution toad model and hide it by pressing Ctrl+ H.
In the panel menu, select Renderer > High Quality Rendering.
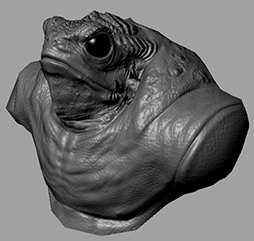
Now you can see the low resolution model with the detail of the high resolution model applied as a texture.
Tumble the view around the toad.
The light on the surface reacts appropriately to all the details on the texture, without any loss in performance.
To remove the statistics at the top of the workspace for the next lesson, de-select Display > Heads Up Display > Poly Count.
NOTE:In addition to the High Quality viewport, you can also view normal maps in Viewport 2.0. Select Renderer > Viewport 2.0 to switch to Viewport 2.0. For more information, see Visualize interactively in Viewport 2.0 in the Maya user guide.
[6] Beyond the lesson
In this lesson you learned how to use a high resolution model to create a normal map for a low resolution model. You learned how to:
Display the poly count for a scene.
Set the source and target for a normal map.
Set the Search Envelope.
Switch between Default Quality Rendering and High Quality Rendering.
You can also try applying other types of transfer maps to a low polygon model. Each mapping feature gives you slightly different looks on your low polygon model. For more information about transfer maps, see Lighting/Shading > Transfer Maps.