Polygon Texturing 2: UV unfolding
Mohamad's interest is in Programming (Mobile, Web, Database and Machine Learning). He is studying at the Center For Artificial Intelligence Technology (CAIT), Universiti Kebangsaan Malaysia (UKM).
[1] Introduction
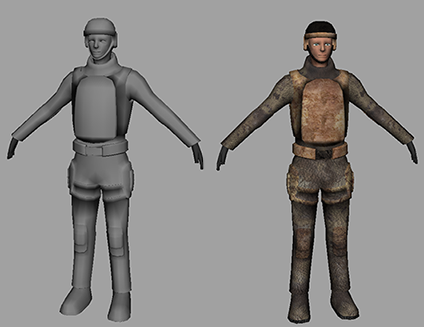
While texturing a flat object is fairly straightforward, texturing an object with curves can pose some unique problems. How do you paint a 2D texture on a curved surface? How do you deal with a texture warping over bumps and grooves? If you try to break apart the UV mesh as in Lesson 1, you can potentially end up with hundreds of small pieces.
To deal with these problems, artists typically use a workflow called unfolding. Unfolding a UV mesh refers to the process of cutting a seam in the UV mesh (a mesh made up of UVs similar to how a polygon mesh is made of vertices) and then unfolding along that seam. The process is similar to cutting a seam along a shirt and laying it flat on a table. By laying out the UVs this way, you can easily paint a texture on the 2D surface, which you can then wrap around the model.
In this lesson you learn how to:
Divide a mesh into separate parts for texturing.
Assign a basic checker pattern to judge the quality of a mapping.
Create a planar mapping.
Cut UV edges.
Unfold a UV mesh using the Unfold option.
Fix an unfolded mesh using the Smooth UVs tool.
[2] Lesson setup
To ensure the lesson works as described, do these steps before beginning:
Make sure you’ve done the steps in Preparing for the lesson.
Open the scene file named Soldier.mb.
This file can be found in the GettingStarted2015LessonData\UVMapping directory that you set as your Maya project.
The scene contains a polygon soldier.
[3] Dividing the mesh
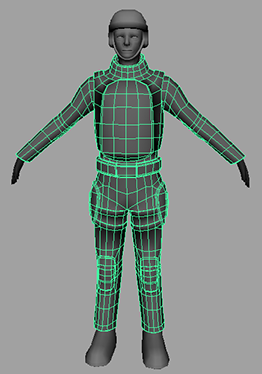
When working with UVs, it is useful to divide the workspace so you can see both the model and the UVs at the same time.
To view the soldier model and its UVs side by side
In the panel menu, select Panels > Saved Layouts > Persp/UV Texture Editor.
The perspective view and UV Texture Editor appear side-by-side in the viewport.
If you select the polygon soldier you will notice that the UVs for the body, arms, and legs are scattered in a pattern that doesn’t resemble the actual model. This isn’t very helpful for painting a texture map.
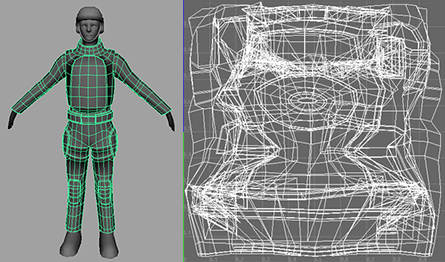
To simplify the job, you need to divide the mesh into multiple pieces that you can then texture individually. Generally, you want to divide the mesh into pieces that can be unfolded into approximate square or rectangle shapes. This requires some pre-planning.
In this lesson you divide the body mesh into a torso, arms, and legs.
To divide the mesh into pieces
In the panel menu select Panels > Orthographic > front.
The perspective view changes to an orthographic front view of the soldier.
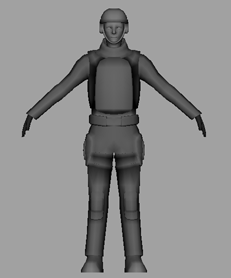
Right-click the mesh and select Face from the marking menu.
Drag-select the faces on the right arm up to the shoulder.
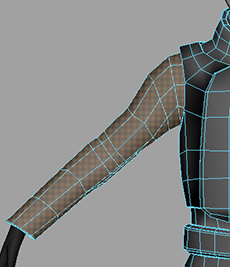
The drag-select operation also selects the faces on the back of the arm.
TIP:Switch to perspective mode and rotate around the arm to make sure all of its faces are selected. You may want to dolly in on areas like the underarm to make sure your selection only includes faces from the arm. If you find any unselected faces or faces that should not be part of your selection, you can Shift-click to add or remove them.
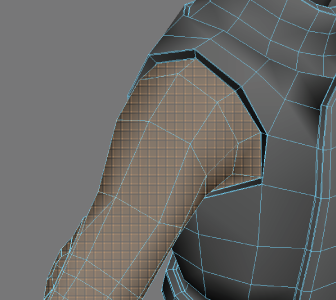
Select Mesh > Extract.
Now if you change the selection mask back to Object, you can select the hand separately from the rest of the body.
Repeat steps 2-4 for the following areas (use the pictures as reference for the boundaries of each extraction).
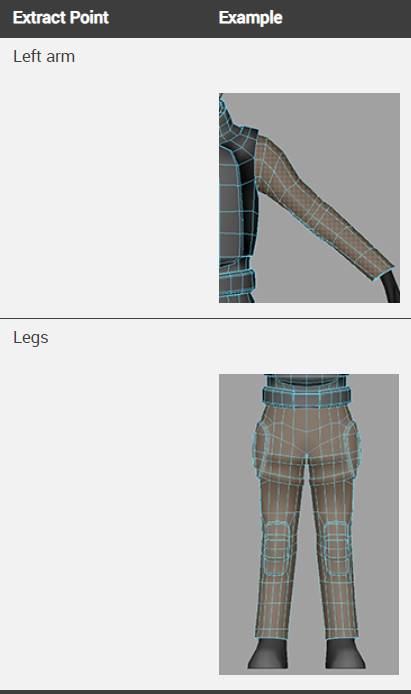
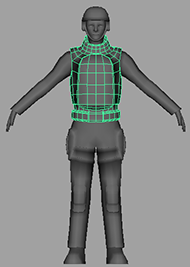
This leaves you with individual meshes for the arms, legs, and chest. The head, feet, and hands have already been done for you. This division allows you to texture each part individually.
[4] Creating a planar map
To texture an organic object, you must start by creating a planar mapping as a base, which you can then unfold.
To create a planar map for the torso
Right-click the torso and select Object Mode from the marking menu.
Select the torso.
Select Create UVs > Planar Mapping >☐.
The Planar Mapping Options window appears.
Select Edit > Reset Settings.
Set Project from to Z axis.
Click Project.
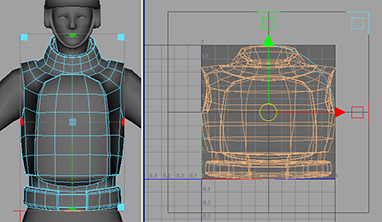
Maya creates a new UV mapping for the torso. If you look at the UV Texture Editor, you can see the new UVs look like a flattened version of the front of the chest. At first glance this may seem perfect, but there’s a major problem here that you need to change the UV Texture Editor view to shaded mode to see.
To turn on shaded UV display
In the UV Texture Editor, click the Shade UVs icon (

), or select Image > Shade UVs.
In shaded UV mode, overlapping faces appear red while non-overlapping faces appear blue.
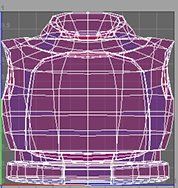
Notice that all the faces for the torso are red. This is because the faces of the front and back of the torso are overlapping. If you tried to apply a texture to the UV mesh like this, you would get the exact same image on the front and the back of the torso.
To fix this, we need to unwrap the texture so that front and back no longer overlap.
[5] Unfolding a UV mesh
Unfolding a UV mesh is the process of cutting a mesh so that you can lay its entire surface area flat. However, before you do this, you want to make sure your UVs are spread out evenly along the surface. You can do this by applying a basic checker pattern to the mesh.
To apply a checker pattern to the torso
Right-click the torso and select Assign New Material from the pop-up menu.
The Assign New Material window appears.
Select Lambert.
Open the Attribute Editor.
In the lambert tab, set the lambert field to checker_pattern.
Click the box next to Color.
The Create Render Node window appears.
Select Checker.
Press 6 to enter Smooth Shade mode.
The torso is covered in a checker pattern.
In the panel menu, select Panels > Perspective > persp.
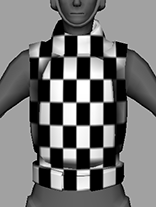
From the front view, the checker pattern looks roughly even with very little distortion. This indicates that the spread of UVs is fairly even. An even spread of UVs is important to avoid texture warping when you apply your texture. In some cases you may need to experiment with different planar mappings to give you the best base to start with.
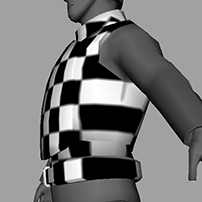
However, the planar projection isn’t perfect. If you look at the sides of the torso, from the armpits to the waist, you can see some warping. This is the ideal place to cut the UV edges for unwrapping.
To cut the UV edges
Right-click the vest and select Edge from the marking menu.
Select all the edges in the line that runs from under the arm, down the side of the soldier’s body to the bottom of the vest. You can do this by double-clicking edges along this path until they are all selected.
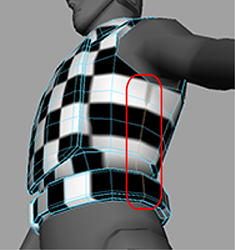
TIP:There are many small edges that must be included in your selection. Dolly, tumble and track the camera to see the edges on the underside of the belt and in the underarm region.
Shift-select the corresponding edge on the other side.
An edge loop on both sides should be selected now.
In the UV Texture Editor, select Polygons > Cut UV Edges.
Now you are ready to unfold the mesh.
To unfold the torso
Right-click the torso and select UV.
Shift-select one UV at the inside tip of each vest strap, along the unfold line.
In the UV Texture Editor, select Polygons > Unfold >☐.
The Unfold UVs Options window appears.
Select Edit > Reset Settings.
Set Pin UVs to Pin selected UVs.
A pinned UV does not move when a UV mesh is unfolded. In general, you want at least one pinned UV when unfolding because it gives the unfold process a point of reference. This is similar to placing a pin in a piece of fabric so that it does not unfurl out of control as you unfold it.
Click Apply and Close.
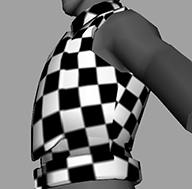
Maya lays the UV mesh out across the UV space. Parts of it may fall outside the 0-1 texture space, but that’s fine for now. More importantly, notice that the pattern is much more even across the mesh now.
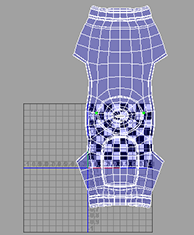
Unfortunately, while you’ve minimized the distortion, you’ve also create a visible seam where you cut the UV edges. This is unavoidable. In general it is best to put your seams in the least visible places. In this case, the seams will be obscured by the arms most of the time and therefore won’t be as noticeable.
[6] Adjusting the checker pattern
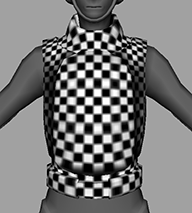
Although not always necessary, it is often helpful to increase the number of squares in your checker pattern. This can help you to more easily spot deformities in the pattern.
To increase the number of squares in the checker pattern
Right-click the torso and select Object Mode from the marking menu.
Select the torso in the perspective view.
Open the Attribute Editor and navigate to the checker_pattern tab.
Click the box next to Color.
In the place2dTexture tab, set Repeat UV to 10, 10.
The number of squares on the torso increases.
[7] Outputting UVs
Now that you have your unfolded UVs, you need to export them so that you can draw a texture on them. You can do this by taking a snapshot of your UV layout.
To export a UV snapshot
Right-click the torso in the perspective view and select UV from the marking menu.
Drag-select all the UVs on the torso.
In the UV Texture Editor, use the Scale Tool and Move Tool to transform the mesh so that it fits inside the upper-right square of the UV Texture Editor.
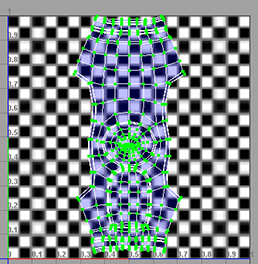
Right-click the torso in the perspective view and select Object Mode.
Select the torso.
In the UV Texture Editor, select Polygons > UV Snapshot.
The UV Snapshot options window appears.
Click the Browse button.
The file browser appears.
Navigate to GettingStarted2015LessonData\UVMapping and enter the name torso_UVs.
Click Save.
Set Image Format to Maya IFF.
Click OK.
Maya creates a file named torso_UVs.iff in the Getting Started folder. If you open this file, you can see the exported UV mesh.
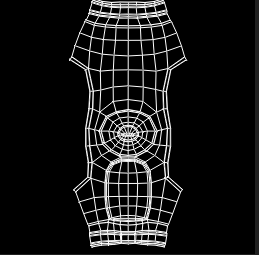
You can now open this file using an external image editor and paint your texture using the mesh as a guide.
NOTE:
If your image editing software does not support Maya .iff images, you can change the image format in the UV Snapshot options window and then export the file again.
[8] Unfolding with constraints
Sometimes you only need to unfold a UV mesh in one direction. This is especially useful when there is only a single seam.
To unfold the arms
Select the soldier’s left arm.
Select Create UVs > Planar Mapping.
Right-click the arm and select Assign Existing Material > checker_pattern.
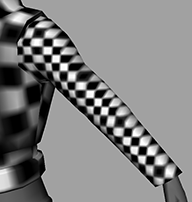
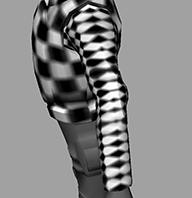
Right-click the arm and select Edge from the marking menu.
Select the edges on the bottom of the arm at the center of the distortion just under the elbow.
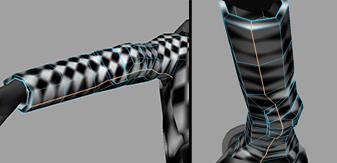
In the UV Texture Editor, select Polygons > Cut UV Edges.
Right-click the arm and select UV from the marking menu.
Drag-select all the UVs on the arm and click the Rotate clockwise button (

).
The UVs rotate so the arm in the UV Texture Editor is vertical.
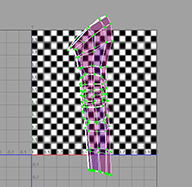
Shift-select one UV at the top of the arm’s bicep and another UV at the tip of the soldier’s cuff.
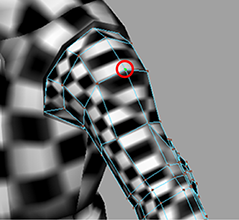
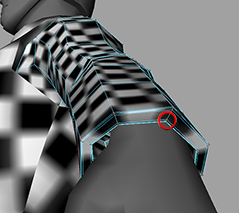
Select Polygons > Unfold >☐.
The Unfold UVs Options window appears.
Set Unfold constraint to Horizontal.
Click Apply and Close.
The UV mesh for the arm is unfolded evenly up and down. This is better than the UV mesh we would get if we unfolded in all directions.
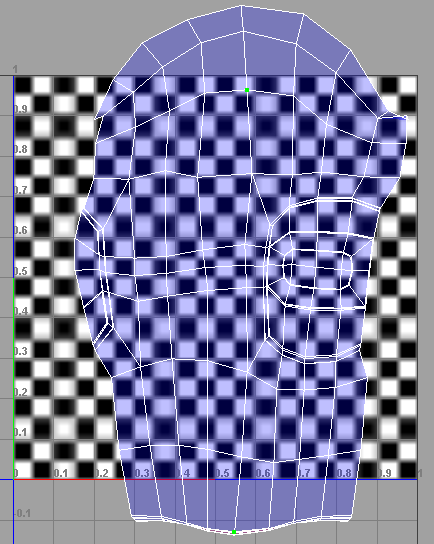
Now you can output these UVs to a file.
To export the UV snapshot
Right-click the arm in the UV Texture Editor and select UV from the marking menu.
Drag-select all the UVs on the UV mesh.
Select the Scale Tool.
In the UV Texture Editor, scale the UV mesh so that it fits inside the upper-right square of the UV Texture Editor.
This step is necessary because a UV snapshot only captures what is in the 1 x 1 UV texture space (the upper right corner).
Right-click the arm in the perspective view and select Object Mode.
Select the arm.
In the UV Texture Editor, select Polygons > UV Snapshot.
The UV Snapshot options window appears.
Click the Browse button.
A file browser appears.
Navigate to GettingStarted2015LessonData\UVMapping and enter the name left_arm_UVs.
Click Save.
Set Image Format to Maya IFF.
Click OK.
Like the torso you did in the previous step, Maya outputs an .iff file containing the UV mesh. You can import this file into an image editor and use it as a template to create a texture.
Now repeat the entire procedure for the right arm. Note that you do not need to output the UVs for the right arm because it will use the same texture as the left arm.
Although you could handle the legs the same way you handled the arms (cutting them into two pieces), you can also treat the entire lower body as a single mesh. You can follow the same procedure as above, except for the following:
Select the edges down the rear until directly underneath the groin then select the edges on the inside of each leg. Cut these UV edges.
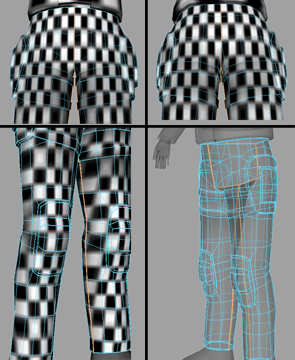
You do not need to pin any UVs for the pants (but you must select the pants as an object to unfold the UVs). Also, remember to turn off Pins UVs in the Unfold UVs Options window.
Like the arms, unfold the UV mesh horizontaly.
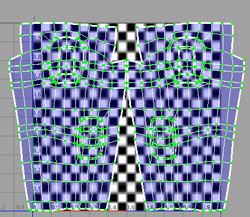
As with the torso and arms, you can now output these UV meshes to an external file to paint a texture on them. For information about how to do this, see Outputting UVs.
[9] Sewing UV Edges
Depending on the mapping you start with, you may sometimes find that your UV mesh is broken up in ways that can ruin your final result. In these cases, you can manually sew UV edges back together.
To map the head to the UV space
Select the head and select Create UVs > Cylindrical Mapping.
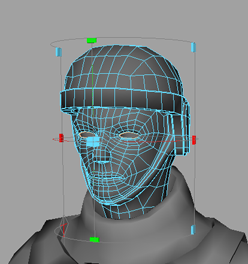
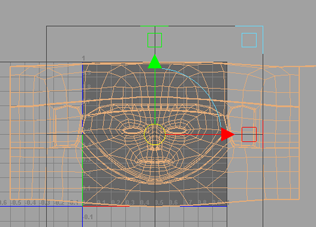
Right-click the head and select Assign Existing Material > checker_pattern.
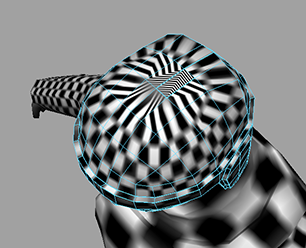
Notice that because you started with a cylindrical mapping, the checker pattern on the sides of the head aren’t warped like in the previous examples. Unfortunately, if you tumble the camera you can see that the top of the head is now warped. In this particular case this is preferable and you will see the reason why later.
If you turn on texture border display by clicking the Texture Border Display icon (

)in the UV Texture Editor, and re-examine the top of the helmet, you can see that a few edges that are not on the line of symmetry are colored thick blue. This indicates that they are on the border of the UV mesh and will cause a seam. You can fix this by sewing these overlapping UV edges together.
To sew UV edges
Right-click the helmet and select Edge from the marking menu.
Shift-select the two thick blue edges at the top of the helmet that are not on the line of symmetry.NOTE:
If none of the edges appear thick blue, click the Texture Border Display icon (

)in the UV Texture Editor
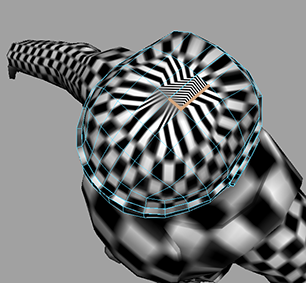
In the UV Texture Editor, select Polygons > Sew UV Edges.
The thick blue edges change to match the other edges.
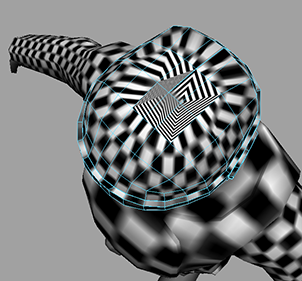
Notice that after sewing the UV edges together, the distortion has actually gotten worse. However, this is only temporary and is fixed when you perform the unfold.
To unfold the helmet’s UV mesh
In the UV Texture Editor, Right-click the face mesh and select UV from the marking menu.
Select the UVs down the center of the face starting from the tip of the helmet’s rim to the bottom of the neck.
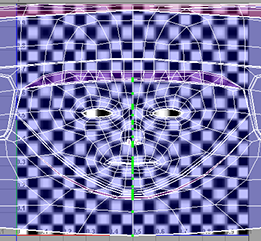
Select Polygons > Unfold >☐.
The Unfold UVs Options window appears.
Set Pin UVs to Pin selected UVs.
Click Apply and Close.
The face unfolds evenly across the texture space.
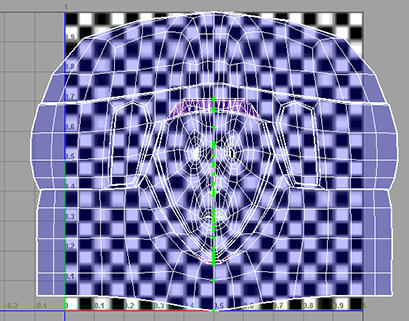
[10] Smoothing/Relaxing a mesh interactively
Sometimes you only want to partially unfold a mesh. For this, you can use the UV Smooth tool to interactively unfold or relax the mesh.
To partially unfold the UV mesh
In the UV Texture Editor, select all the UVs.
Select Tool > Smooth UV Tool >☐.
The Smooth UV Tool options window appears.
Select Edit > Reset Settings.
Set Space to UV Space.
Click Apply and Close.
Two controls appear over the UV mesh called Unfold and Relax.
Click Unfold and drag the mouse to the right.
The UV mesh unfolds as you drag the mouse to the right.
Continue to drag until the UV mesh roughly resembles the picture below.
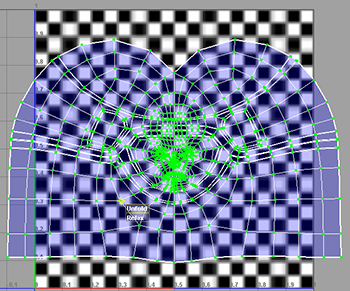
If you reach the edge of the screen you can release the mouse button, click the Unfold control and drag again.
[11] Fixing problem areas
You now have an unfolded UV mesh with no major overlapping faces. However, there are still a few minor problem areas where the mesh overlaps itself (particularly the eyes and mouth).
You can use the Smooth UV Tool to fix small imperfections in the shell with targeted unfolds or relax operations.
To fix the eyes
In the perspective view, right-click the soldier’s head and select Edge from the marking menu.
Shift-select the four closest edge loops that surround each eye. You can do this quickly by Shift+ double-clicking one edge in each loop.
In the UV Texture Editor, Ctrl+ right-click the UV mesh and select To UV from the marking menu.
The edges selected around the eyes are converted to the UVs selected around the eyes.
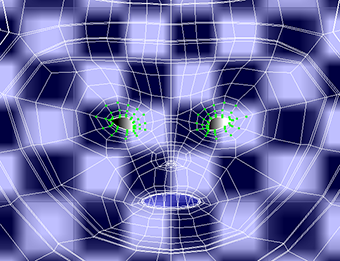
Click the Smooth UV Tool icon (

).
Drag the Relax control to the right until the eyes appear round.
As you drag the Relax control, the selected UVs relax until they are round.
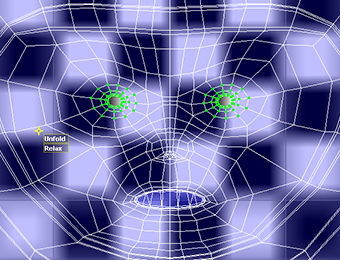
Now you can fix the nose and mouth in a similar manner.
To fix the nose
Select a group of UVs on and around the nostrils.
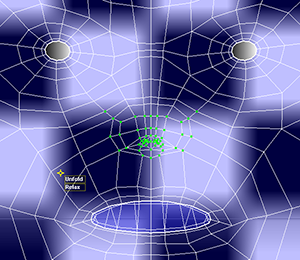
Drag the Relax control to the right until the UVs stop moving.
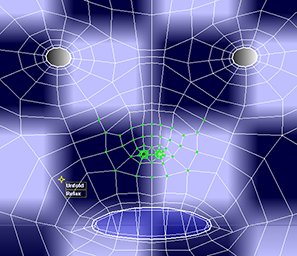
To fix the mouth
In the perspective view, Right-click the head and select Edge from the marking menu.
Shift-select the 4 edge loops around the mouth. You can do this quickly by Shift+ double-clicking one edge in each loop.
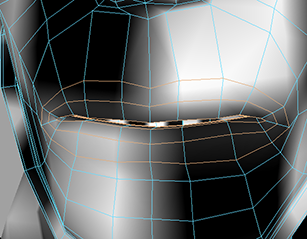
In the UV Texture Editor, Ctrl+ right-click the UV mesh and select To UV from the marking menu.
The edges selected around the mouth are converted to the UVs selected around the mouth.
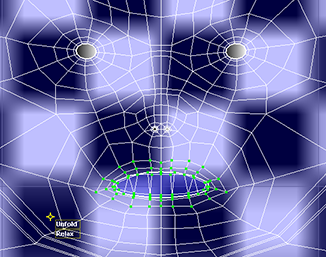
Drag the Relax control to the right until the UVs stop moving.
The mouth UVs even out into a circular shape.
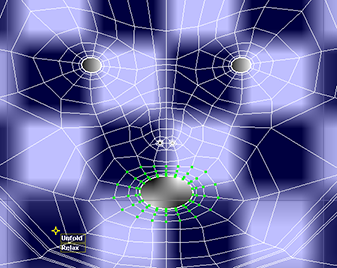
Select all the UVs on the head.
Select the Scale Tool and scale the UVs so that they fit in the upper right corner of the UV space.
The UV mesh for the soldier’s head now has no UV faces overlapping. This allows you maximum control over what shows up in each portion of the head when you create the texture map for the soldier.
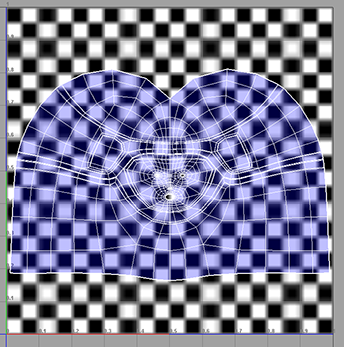
As with the rest of the body, you can now output these UV meshes to an external file to paint a texture on them. For information about how to do this, see Outputting UVs.
[12] Applying textures
Now that you’ve output all the UV meshes, you can import them into an external image editor to create a texture.
Once you’ve created associated texture files, you can apply them to your model. For the purposes of this tutorial, textures have been provided for you in the sourceimages folder.
To apply the texture for the torso
In the perspective view, Right-click the torso and select Assign New Material from the pop-up menu.
The Assign New Material window appears.
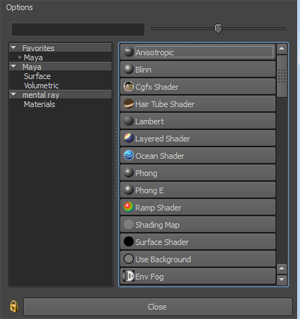
Select Lambert.
The soldier’s torso turns matte grey.
Open the Attribute Editor and select the lambert tab.
Change the name of the lambert material to Mat_Torso.
Click the box next to Color.
The Create Render Node window appears.
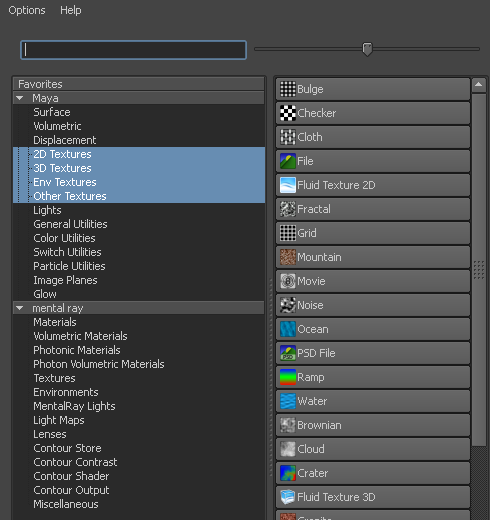
Click File.
In the Attribute Editor, click the folder icon next to the Image Name field.
A file browser appears.
Navigate to the GettingStarted2015LessonData\UVMapping\sourceimages folder, select soldier_torso.tif, then click Open.
The body armor texture is applied to the soldier’s body. If the texture does not appear in the scene, press 6.
Select all the UVs and click the Smooth UV Tool icon (

). Slowly unfold the UVs until they roughly match the details of the texture as shown below.
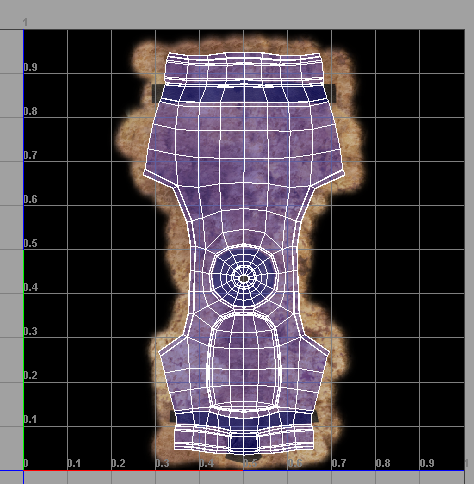
If the texture is not aligned or sized correctly you can adjust the UVs in the UV Texture Editor using the Toolbox.
Shift-click the torso and select Object Mode from the marking menu.
Select the torso in the perspective view.
In the Attribute Editor, navigate to the Mat_Torso tab,
Click the box next to Bump Mapping.
The Create Render Node window appears.
Click File.
A file tab appears in the Attribute Editor.
In the file tab, click the browse icon next to Image Name.
A file browser appears.
Navigate to the GettingStarted2015LessonData\UVMapping\sourceimages folder, select soldier_torso_normals.tif, and click Open.
Normal maps appear on the soldier’s chest. Normal maps give the flat portions of the texture the illusion of 3D bumps.
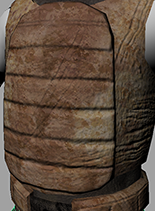
NOTE:You may need to perform a render of the scene view or switch to Renderer > High Quality Rendering or Renderer > Viewport 2.0 to visualize the normal maps.
Now you can repeat the process for the other body parts by applying the following textures:
| Appendage | Material node name | Texture filename | Normals filename |
| Left Arm | Mat_Arm | soldier_arm.tif | soldier_arm_normals.tif |
| Right Arm | Mat_Arm (reuse from above by using Assign Existing Material). | soldier_arm.tif | soldier_arm_normals.tif |
| Legs | Mat_Legs | soldier_legs.tif | soldier_legs_normals.tif |
| Left Foot | Mat_Feet | soldier_boot.tif | soldier_boot_normals.tif |
| Right Foot | Mat_Feet (reuse from above by using Assign Existing Material). | soldier_boot.tif | soldier_boot_normals.tif |
| Head | Mat_Head | soldier_head.tif | soldier_head_normals.tif |
| Eye | Mat_Eye | soldier_eye.tif | none |
NOTE:
When reusing a texture for a mirrored appendage (Right Arm or Right Foot), you must flip the UVs in the UV Texture Editor to fit the texture. You can do this by selecting all the UVs and clicking the Flip selected UVs in U Direction button (

) in the UV Texture Editor.
[13] Beyond the lesson
In this lesson you learned how to unfold a UV mesh so that you can create a texture for a complex organic mesh.
You can divide a mesh into parts for texturing.
You can create a planar mapping of UVs.
You can apply a basic checker texture to find problem areas.
You can cut UV edges in obscure areas to create a seam for unfolding.
You can pin a UV and unfold a mesh in all directions or constrained to a single direction.
You can partially unfold a UV mesh with the UV Smooth Tool.
You can relax UVs to fix problem areas.